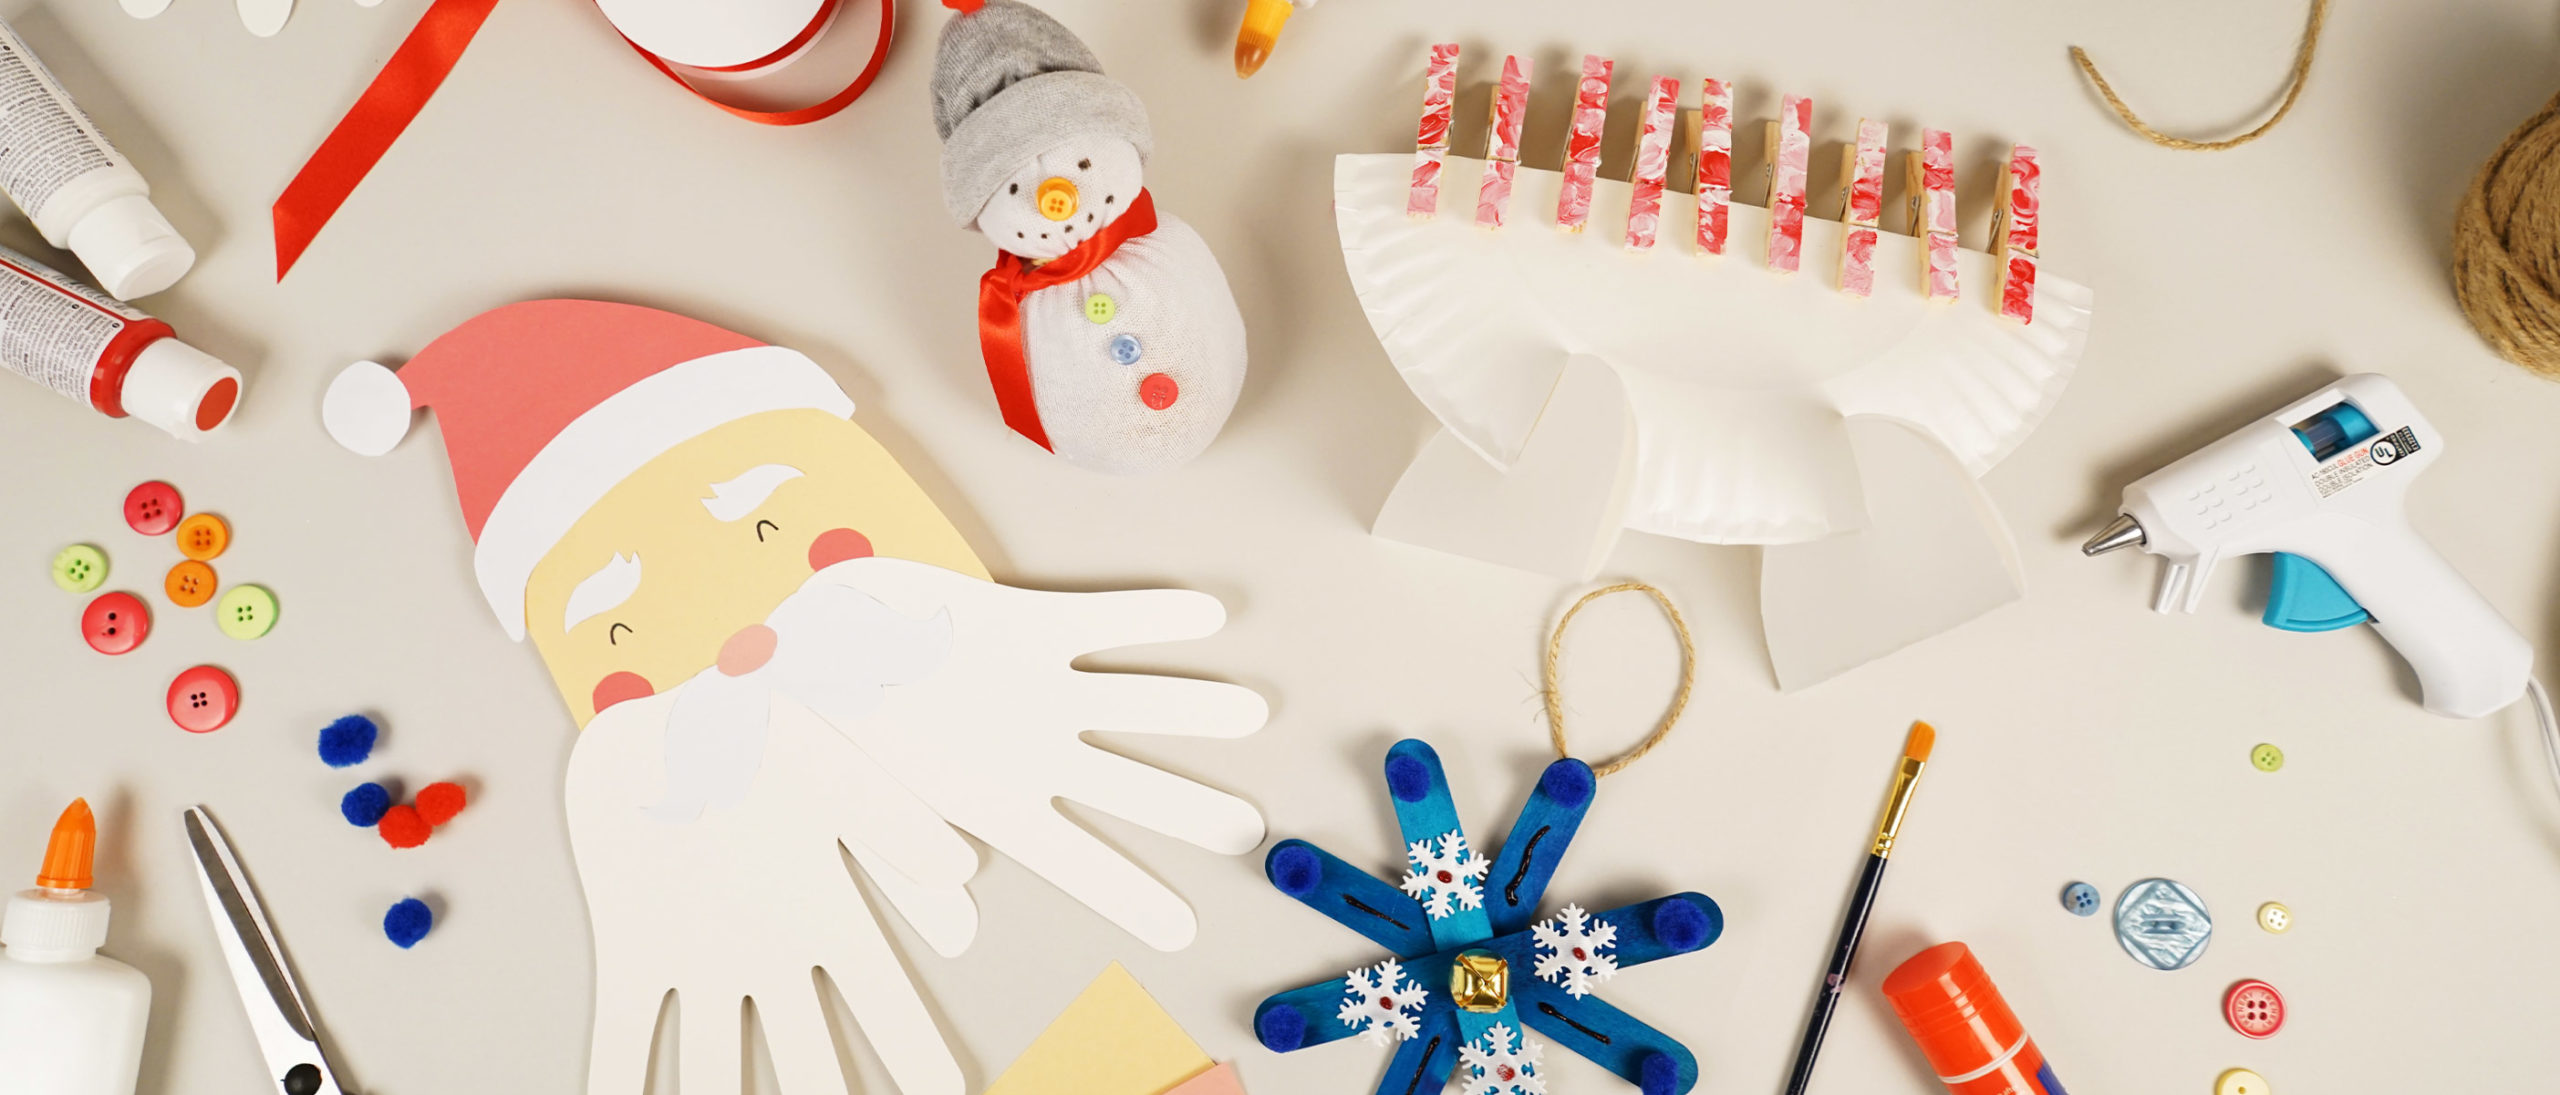
The best season of the year is finally here – holiday season! ‘Tis the season for families to spend some extra time together doing fun activities. What better way to spread holiday cheer than crafts time with the kiddos? Check out these simple and affordable holiday crafts that are perfect for a weekend family project.
Popsicle Stick Snowflake Ornaments
Decorating the Christmas tree brings excitement year after year. These popsicle stick snowflake ornaments will bring that excitement to a new level by adding homemade ornaments to the tree! Decorate them as you please and add some personal spunk. You can even write the year on the back with a fun message and look back at them over the years!
Materials:
- Popsicle sticks (normal or colored)
- White glue
- Hot glue gun and hot glue sticks
- Twine for hanging
Decorative Materials:*
*These are some ideas – you can decorate with anything you want!
- Paint
- Christmas bells
- Glitter stickers
- Silver glitter
- Tinsel pom poms and/or craft foam balls
- Fabric snowflakes
Instructions:
- Paint your popsicle sticks, unless you are using colored ones.
- Hot glue your popsicle sticks together forming the shape of a snowflake. Start by making two separate “+” shapes and then glue them together so that they create a snowflake shape. Make sure an adult is present to supervise this step.
- Hot glue the back of the snowflake to add your twine for hanging. Make sure an adult is present to supervise this step.
- Now comes the fun part! Time to decorate! The best part about this craft is that there are no rules. You can do all different kinds of decorations to add your personal touch.
Paper Plate Menorah
Hanukkah starts on December 10th this year so get ready for the eight nights and bring the fun with this awesome paper plate menorah!
Materials:
- 3 paper plates
- 9 clothespins
- Paint
Instructions:
- Paint the clothespins any color you’d like, and set them aside to dry. These will be the candles on your menorah.To create the menorah, fold one paper plate in half.
- Cut the inner circle out of the two remaining paper plates. Fold these circles in half.
- Return to your first plate, which is folded in half, and cut 2 vertical slits roughly an inch long, into the rounded side. This will be how the menorah attaches to the base, so make sure that the slits are not too far apart.
- Place the rounded edge of the folded circle into each slit.
Playing with the Menorah:
This toy can be used to act out the traditional lighting of the menorah. Kids can practice adding the candles to the menorah from right to left. Then, they can pretend to light the candles from left to right.
Santa Handprint
Crafts are always more fun when they have a personal touch. Using your own handprints to create something? Count us in! These Santa handprints are a great activity that everyone will enjoy!
Materials:
- Colored cardstock or construction paper (in white, red, peach & pink)
- Glue stick
- Scissors
- Black Marker
- Santa template (click to download)
Instructions:
- Download the Santa template, print on white cardstock or computer paper and cut out each piece.
- Trace the cheeks, nose, and Santa hat onto red and pink cardstock. Cut them out.
- Trace your child’s hand onto white cardstock and cut it out.
- Glue the base of the hat behind the white fluff, and then glue the pom onto the red hat.
- Glue the assembled Santa hat onto the top of Santa’s head.
- Glue the eyebrows below the Santa hat and then draw in the eyes with the black marker.
- Glue the red cheeks on either side of Santa’s face below the eyes.
- Position the handprint beard on Santa’s face with the fingers pointed down. Once you get a position you like, glue them onto the face.
- Glue the mustache on top of the beard.
- Glue the nose on top of the mustache.
No-Sew Sock Snowman
Do you want to build an (indoor) snowman? Nothing screams holiday more than a friendly carrot-nosed snowman! And now you can bring your own snowman to life with this easy craft – no snow required! This No-Sew Sock Snowman is a great craft to cheer the whole household up!
Materials:
- 1 white sock
- 1 sock of any color for the hat
- Rice
- Rubber bands (or thread)
- Colorful buttons
- Ribbons
- Glue gun
- Markers or paint
- Pom poms (use orange pom poms for the carrot nose effect!)
Instructions:
- Fill your white sock with rice. Once you are happy with the amount (and size) of your sock snowman, tie the top with the rubber band.
- Place another rubber band in the middle of the rice-filled sock to form the head shape.
- Hot glue the buttons to the bottom half of your snowman.
- Draw the mouth and eyes with a black marker or with black paint. You can also add pink cheeks.
- Make a nose out of two small orange pom poms. Hot glue this to the face of your snowman.
- Add a ribbon for the scarf. A glue gun works best for ribbons!
- You can cut off the excess white sock (or you can tuck it in the hat we will be making next).
- Cut the colored sock (cut the foot part, without heel). Roll it a bit and place it on the head of your snowman. You can leave it as it is or you can secure it with some hot glue.
The holiday season just got a whole lot merrier with these super simple and affordable crafts for kids! Make sure you use the Flipp app to find the best deals on materials and to save on all your shopping needs!